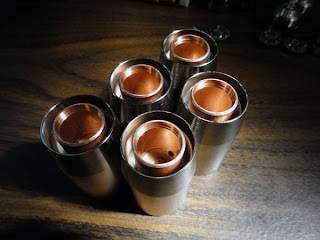
I took some photos while I was assembling my first batch of lights and thought I'd share them here. At this stage, all of the machining, finishing, and nickel plating is finished. Now I'm assembling all of the components into completed lights.
 |
| These are the bodies I'm assembling, fresh from Amex Plating. |
1) Make a quick jig to cut all of my wire to the right length. This consists of a hollow aluminum tube and my fancy tongue depressor with a sharpie mark to indicate the distance. A large roll of wire is out of the frame to the left. I just cut and pull the wire through the tube. Rinse and repeat.
2) Cut all the wire I need to length
4) Then I back each LED with a piece of thermally conductive adhesive tape.
5) Next I have to check the fit of each copper sleeve to make sure the head and the sleeve have the proper clearance between them. The get pressed together and the fit is critical.
6) NowI use an arbor press (should have taken a photo) to drive the sleeve into the head. These components are now semi-permanently attached. This provides good electrical and thermal interface.
7) Each LED is inserted into the front of the head and the wires pass through to the back side like you see here. I made another special tool to help align the LED perfectly on-center with the bore.
8) Soldering again. This time attaching the LED driver circuit board
9) After soldering the leads on the circuit boards I press the LED driver into the sleeve.
10) Finally time to install the reflectors into the heads. They just drop in and are held down by the lens and the o-ring installed in the next step
11) A special lens drops in on top of the reflector and an o-ring fits snugly between the lens and the body of the light. The lens is made specifically for flashlights and is extremely optically clear. This ain't no window glass. It's also coated with an AR (Anti-Reflective) coating on both sides. It's so perfectly clear you can barely tell there is any glass at all.
12) I already posted an assembly sequence of the tailcap so I won't duplicate it here. Suffice to say these are the parts that go into the tailcap.
13) Almost there! Just need to install and oil the o-rings on the tailcap and the head. I also oil all of the threads when I assemble the lights.
14) O-rings on the head end of the flashlight bodies
15) And there you have it...flashlights! Easy right?


No comments:
Post a Comment